|
Home > Online Product Documentation > Table of Contents > Making a Static Web Page Dynamic by Editing XSLT Making a Static Web Page Dynamic by Editing XSLTSuppose you have an XML document with a repeating element, and you want to build a Web page that displays information for each of the elements. For example, you might have a document that contains information for hundreds of books, customer accounts, sales calls, or even chemistry experiments. It is relatively easy to create an HTML file that elegantly displays the information for one element. You can then import this file into Stylus Studio, and modify it in a few steps to display all the elements in your XML document. This section provides step-by-step instructions for converting a static Web page that displays information about one video into a dynamic Web page that displays information about many videos. The process is described in the following major steps:
If you follow the instructions in these topics, you create the
Stylus Studio includes an additional sample stylesheet,
An alternative to editing the XSLT source is to use the WYSIWYG tab to compose HTML graphically. This feature is described in Making a Static Web Page Dynamic Using the WYSIWYG Editor. Importing a Sample HTML File
To import an HTML file:
1. In the Stylus Studio menu bar, click
File >
Document Wizards.
2. Click the
XSLT Editor tab.
3. Double-click
HTML to XSLT. Stylus Studio displays the
Open dialog box.
4. Open
movies.html, which is in the
examples\VideoCenter directory of your Stylus Studio installation directory.
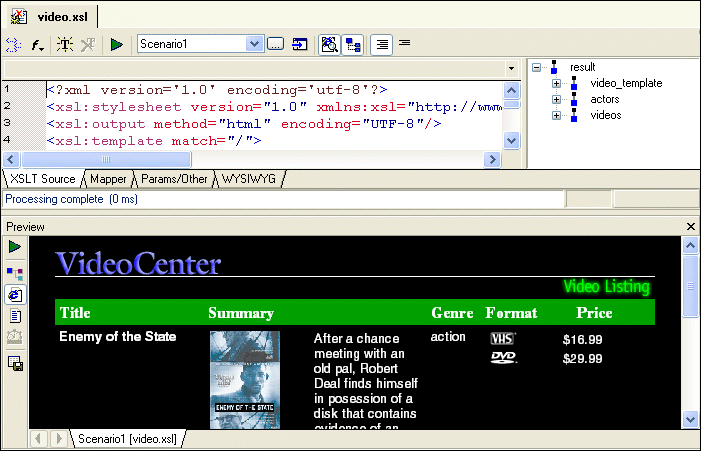
Stylus Studio displays a stylesheet in the XSLT Editor. The stylesheet contains one template, which matches the root node (
If you want, you can move and enlarge the XSLT editor window. If you do, leave a few inches at the bottom of the Stylus Studio window for the Preview window, which Stylus Studio will display later in this procedure.
5. In the XSLT editor tool bar, click
Preview Result
Stylus Studio displays the Scenario Properties dialog box. A scenario associates a stylesheet with an XML source document. When Stylus Studio imports an HTML file, it automatically creates the stylesheet that can generate that HTML file.
6. In the
Scenario Properties dialog box, in the
Scenario Name: field, type
Video Scenario 1.
7. Next to the
Source XML Url: field, click
Browse
8. In the
Open dialog box, double-click
videos.xml, which is in the
examples\VideoCenter directory of your Stylus Studio installation directory.
9. In the
Base URL for HTML Links Resolution: field, type the name of the directory in which Stylus Studio is installed followed by \examples\VideoCenter:
Stylus_Studio_install_dir
\examples\VideoCenter
You must type an absolute path.
10. Click
OK.
Stylus Studio displays the Save As dialog box.
11. In the
URL field, type
video.xsl and click the
Save button.
Stylus Studio applies the new stylesheet to the
The result provides information about one video. Also, Stylus Studio displays the tree of the XML source document in a pane to the right of the stylesheet. What to do nextTo modify the stylesheet in the XSLT Source tab, continue to the next topic, Creating the video Template. To modify the stylesheet using the WYSIWYG tab, see Making Repeating Table Rows in the WYSIWYG Editor. Creating the video TemplateThis topic is part of a sequence that starts with Importing a Sample HTML File. To create the video template, follow these steps:
1. In the source tree pane of the XSLT editor, click the plus sign next to the
videos element.
2. Double-click the
video repeating element.
Stylus Studio creates a template that matches the
3. In the
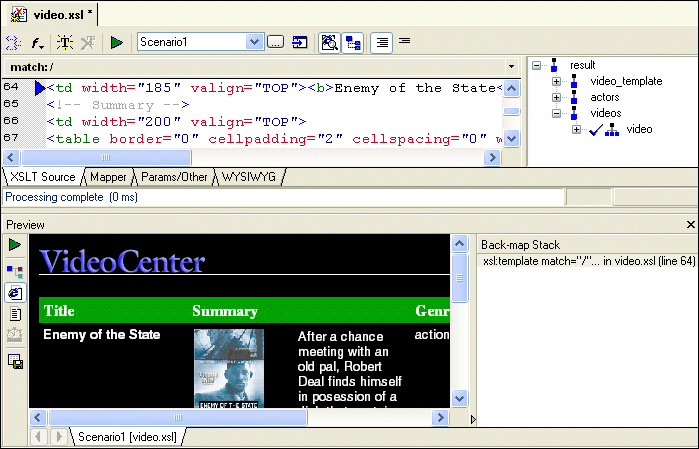
Preview window, click somewhere in the movie title Enemy of the State.
Stylus Studio displays the template it created that matches the root element, and flags the line that generates the title. This shows you about where the HTML markup starts for a single video. In the next few steps, you are going to move the markup for the
4. In the XSLT Editor, highlight all markup that displays a single video.
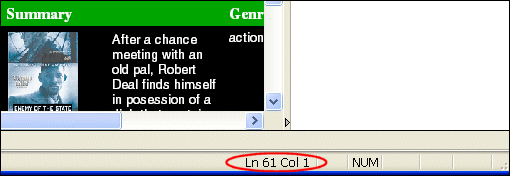
a. Place the text cursor on line 61 - between the
</TR> tag and the comment tag in the following line:
<!-- *** Start Video *** -->
b. Drag your cursor down through the end of the following line, which is around line 110:
<!-- *** End Video *** -->
5. Press Ctrl+X to cut the highlighted text.
6. Scroll down to the
video template.
7. Place your cursor on the blank line in the
video template body (line 112) and press Ctrl+V to paste the video markup into its new template.
8. Click
Preview Result
The display no longer includes any information about the video. This is because you moved the video markup to the
9. Click
Save
Instantiating the video TemplateThis topic is part of a sequence that starts with Importing a Sample HTML File. To instantiate the video template, follow these steps:
1. In the XSLT Editor, put the text cursor in line 61 (the spot from which you cut the markup for the
video element).
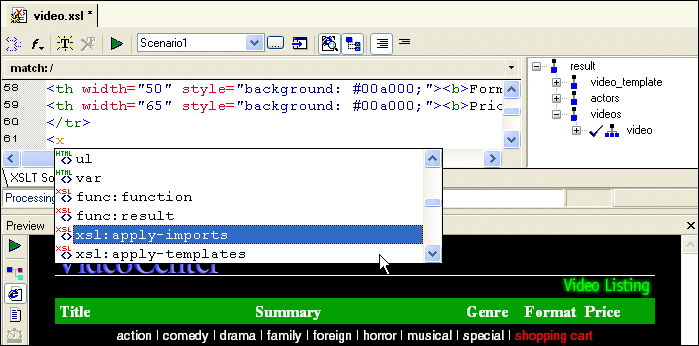
2. Type
<x.
Stylus Studio displays the Sense:X tag completion menu.
3. Scroll down and double-click
xsl:apply-templates.
Stylus Studio inserts the xsl:apply-templates instruction.
4. Type a space.
Stylus Studio again displays the choices for what you can enter.
5. Double-click
select. A new SenseX: tag completion menu appears.
6. Double-click
result.
7. Type a forward slash (/).
8. Double-click
videos and type a forward slash (/).
9. Double-click
video and type "/>.
The XSLT you have just composed selects all
<xsl:apply-templates select="result/videos/video"/>
10. Click
Preview Result
Now you can see that the XSLT processor does instantiate the
11. Click
Save
Making Titles DynamicThis topic is part of a sequence that starts with Importing a Sample HTML File. To change the video template to display the title for each video, follow these steps:
1. In the
Preview window, click somewhere in the movie title Enemy of the State.
In the
Backmap Stack pane, Stylus Studio shows you the XSLT instruction that generated the output you clicked in the result document. In the XSLT Editor pane, Stylus Studio's back-mapping feature points to the line that contains
2. Delete the text
Enemy
of
the
State.
Do not cut the
3. In the spot in the line where you deleted
Enemy of the State, type the following instruction, or select its parts from the Sense:X tag completion lists.
<xsl:apply-templates select="title"/>
This instructs the XSLT processor to instantiate a template that matches
This default template operates on the children of the node for which it is instantiated. In this case, each time the default template is instantiated for a
The templates that match
4. Click
Preview Result
Now the display for each video has a different title, but the rest of the information (the summary, the image, and so on) is that for Enemy of the State.
5. Click
Save
Making Images DynamicThis topic is part of a sequence that starts with Importing a Sample HTML File. To change the video template to display the image associated with each video, follow these steps:
1. In the
Preview window, click in the Enemy of the State image.
Again, Stylus Studio's back-mapping feature identifies the line in the stylesheet that generates the image.
The
Backmap Stack window now displays two
2. To edit the expression that identifies the image, in the XSLT editor pane, delete
id1244100 from the line Stylus Studio is pointing to.
3. Replace the specific ID with the following attribute value template:
{@id}
The result should look like the following:
<img src="images/video/{@id}.gif" align=BOTTOM" ...
During XSLT processing, the XSLT processor replaces the attribute value template with the ID for the current video.
4. Click
Preview Result
Stylus Studio displays a different image for each title.
5. Click
Save
Making Summaries DynamicThis topic is part of a sequence that starts with Importing a Sample HTML File. To change the video template to display the summary of each movie, follow these steps:
1. In the
Preview window, click in the Enemy of the State summary.
Stylus Studio uses back-mapping to point to the line that generates the summary.
2. In the XSLT editor pane, delete the text for the summary. Do not delete any markup.
3. Insert the following instruction, or select its components from the Sense:X tag completion lists, where you deleted the summary text:
<xsl:apply-templates select="summary"/>
Again, the XSLT processor will use the default templates to copy the text to the result document.
4. Click
Preview Result
Stylus Studio displays a different summary for each title.
5. You can follow the same procedure described here to make the other child elements of the
video element (genre, rating, and so on) dynamic. But before you do that, save the work you have already done.
6. Click
Save
|
XML PRODUCTIVITY THROUGH INNOVATION ™

 Cart
Cart


