|
Home > Online Product Documentation > Table of Contents > Creating an ODBC System Data Source Creating an ODBC System Data SourceYou can use the procedure described in this section to create an ODBC system data source if one does not already exist for the database you wish to use as a Stylus Studio DB-to-XML data source.
To create an ODBC system data source:
1. Select
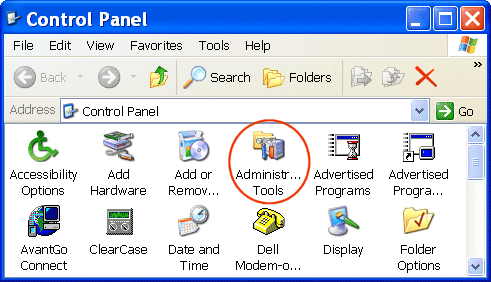
Start > Settings > Control Panel from the Windows menu.
The Control Panel window appears.
2. Double-click
Administrative Tools on the
Control Panel window.
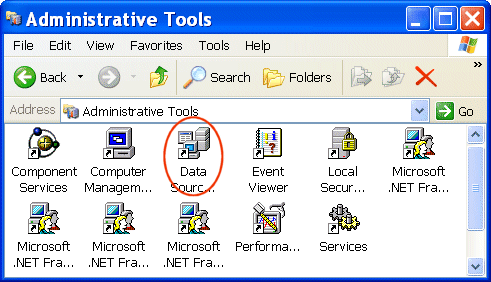
The Administrative Tools window appears.
3. Double-click
Data Sources (ODBC) on the
Administrative Tools window.
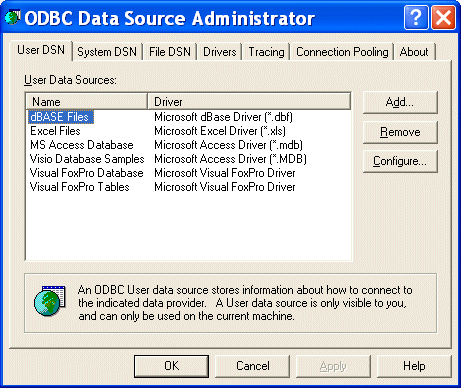
The ODBC Data Source Administrator dialog boxappears.
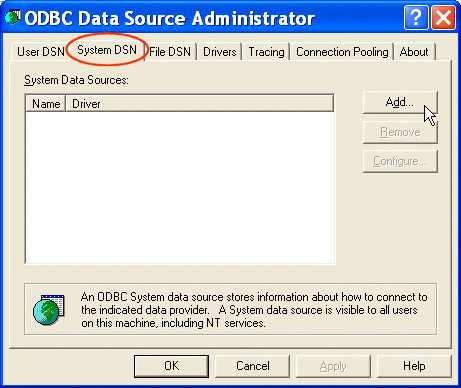
4. Click the
System DSN tab and then click the
Add button.
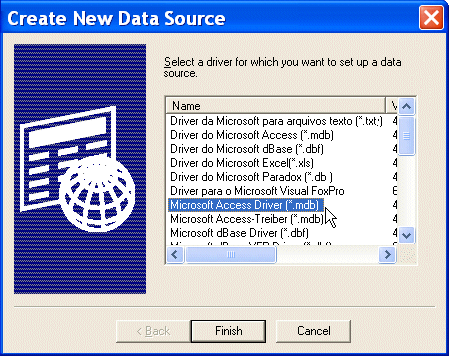
The Create New Data Source dialog box appears.
5. Scroll down the list until you find the driver associated with the database for which you want to create a data source, and then click
Finish.
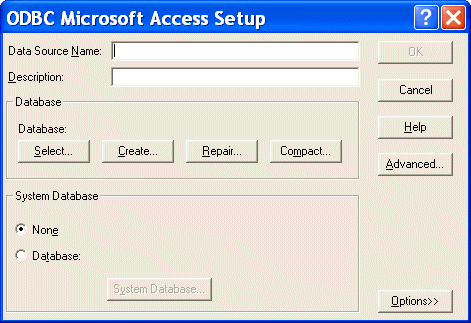
The ODBC Setup dialog box appears.
Note that the information in the ODBC Setup dialog box, including the dialog box title, varies based on the database driver you selected in step 5. There, we selected a Microsoft Access database driver, so the information displayed in the ODBC Setup dialog box is specific to that database.
6. Enter a name in the
Data Source Name field, then click the
Select button in the
Database group box.
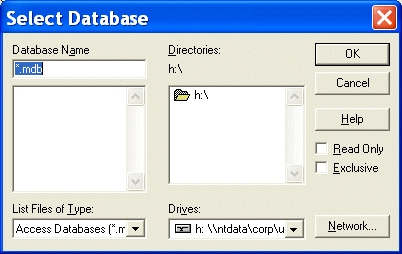
The Select Database dialog box appears.
7. Navigate until you locate the database you want to use as the data source and then click
OK.
You are returned to the ODBC Setup dialog box.
8. Click
OK on the
ODBC Setup dialog box.
The ODBC system data source is created.
9. Configure the data source in DataDirect SequeLink Server Manager as described in the following section,
Configuring DataDirect SequeLink to Reference an ODBC System Data Source.
|
XML PRODUCTIVITY THROUGH INNOVATION ™

 Cart
Cart