|
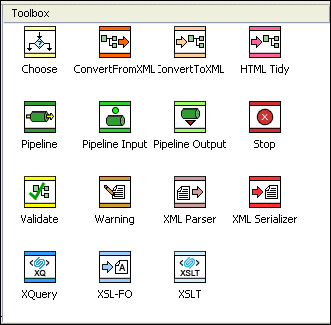
Home > Online Product Documentation > Table of Contents > Adding Nodes to an XML Pipeline Adding Nodes to an XML PipelineThere are two ways to add nodes to an XML pipeline. You can Using Existing DocumentsTo create a node in an XML pipeline using an existing document, just drag and drop the document (from the Project window or the File Explorer, for example) on the XML pipeline canvas. This creates a node that represents the document you dropped on the canvas. For example, if you drag and drop an XQuery document, Stylus Studio creates an XQuery node based on that XQuery document. It also incorporates that XQuery document's default scenario properties settings, including its input and output URLs, processor, and post-process instructions, validation instructions, and so on. In addition to dropping a file on the XML pipeline canvas, you can also drop it on an existing node or on the appropriate Value field for that node displayed in the Properties window. A node's input and output ports cannot be used as drop targets. Using the ToolboxTo create a node in an XML pipeline using the Toolbox, just drag an icon from the Toolbox pane and drop it on the XML pipeline canvas.
This creates a node that is not yet implemented, whose properties you then need to specify - either by typing, or by dragging an external document and dropping it on the node or one of its Value fields in the Properties window. For example, if you drag the XSLT icon and drop it on the canvas, you would need to specify values for the input and output nodes, as well as the URL of the XSLT document you want that node to represent in your XML pipeline. Available tools are described in the following table.
Node and Port NamesThe default node name is a variation of the name as it appears in the Toolbox pane - the default name for the XSL-FO operation is FO Operator, for example. If you use an existing document to create a node, Stylus Studio uses the file name as the default node name. Node names are used for documentation purposes only; they do not affect XML pipeline execution, though they do appear as strings in the generated code and in messages in the XML pipeline execution log displayed in the Preview window. Node names appear in the XML pipeline as tooltips when you place the pointer on the node.
|
XML PRODUCTIVITY THROUGH INNOVATION ™

 Cart
Cart


