Cart
Cart
|
Home > Online Product Documentation > Table of Contents > Using the Spell Checker Using the Spell CheckerYou can use the Stylus Studio Spell Checker with all of Stylus Studio's text-based editors (like editors for XQuery and XSLT, for example) to both actively and passively check your documents for typographical errors such as misspellings and repeated words.
Default Spell CheckingThe Spell Checker is on by default for most editors. This means that when you open a document in a Stylus Studio text editor, and as you type in that document, Stylus Studio checks the document for typographical errors. Words that the Spell Checker identifies as possibly containing a typographical error are underlined with a red "squiggle", like the word Worx shown in Figure 122.
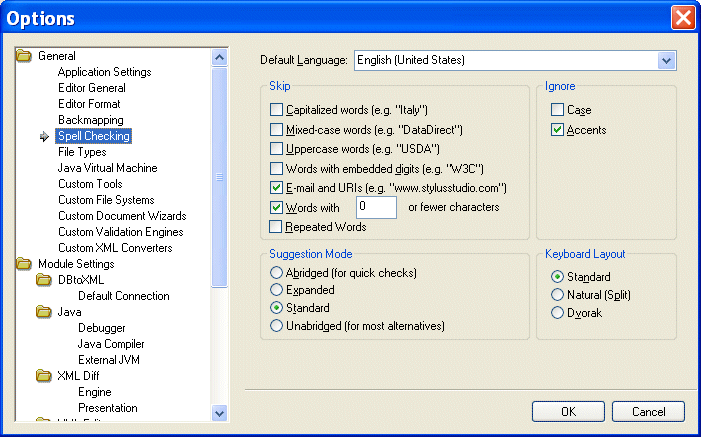
Manual Spell CheckingAt any time, you can manually spell check a document by selecting Tools > Check Spelling from the Stylus Studio menu. When you do this, Stylus Studio starts the Spell Checker, which reads through the current document. When it finds a possible typographical error, Stylus Studio displays the Spelling dialog box, as shown in Figure 123. Using the Spelling dialog box, you can Specifying Spell Checker SettingsYou specify Spell Checker settings using the Spell Checking page of the Options dialog box.
Spell Checker settings include
How to Spell Check a DocumentTo spell check a document:
1. Select
Tools > Check Spelling from the menu.
Stylus Studio starts checking the document for typographical errors. If it finds a typographical error, it displays the Spelling dialog box.
2. Once you select an action, the Spell Checker continues checking the document.
When you have addressed all identified errors in the document (either by replacing, correcting, or ignoring them), the Spell Checker stops. Using the Personal DictionaryThe Stylus Studio Spell Checker comes with its own dictionary. You can create a personal dictionary and fill it with your own entries. Personal dictionaries are used in conjuction with the Spell Checker dictionary across all Stylus Studio editors. To add entries to the personal dictionary, you can
The personal dictionary is stored in the
To add a word to the personal dictionary:
1. Start the Spell Checker and display the
Personal Dictionary Editor dialog box (click
Edit on the
Spelling dialog box).
2. Enter a word in the
New Word field.
3. Click the
Add button.
The word appears in the Words in Personal Dictionary list box.
4. Click the
Close button.
To import lists into the personal dictionary:
1. Start the Spell Checker and display the
Personal Dictionary Editor dialog box (click
Edit on the
Spelling dialog box).
2. Click the
Import button.
The Open dialog box appears.
3. Select the
.txt file you want to import into the personal dictionary and click
Open.
The words in the list you import appear in the Words in Personal Dictionary list box.
4. Click the
Close button.
To export the personal dictionary to a .txt file:
1. Start the Spell Checker and display the
Personal Dictionary Editor dialog box (click
Edit on the
Spelling dialog box).
2. Click the
Export button.
The Save As dialog box appears.
3. Navigate to the directory in which you want to save the copy of the personal dictionary.
4. Enter a name in the
File name field.
5. Click
Save.
The contents of the personal dictionary is saved to the text file.
6. Click the
Close button.
|
XML PRODUCTIVITY THROUGH INNOVATION ™