Cart
Cart
|
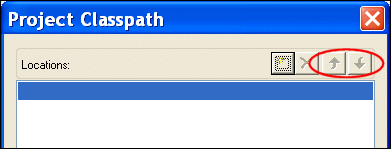
Home >Online Product Documentation >Table of Contents >Setting a Project Classpath Setting a Project ClasspathYou can set a classpath at the project level. When Stylus Studio compiles or runs Java code, it always checks the project for a locally defined classpath. Specifying Multiple ClasspathsYou use the Project Classpath dialog box to specify one or more classpaths for a project. If multiple classpaths have been defined, Stylus Studio searches them in the order in which they are listed in the Project Classpath dialog box. You can use the up and down arrows at the top of this dialog box to change the classpath order. How to Set a Project ClasspathTo set a classpath for a project:
1. Open the Project Window if it is not already displayed.
2. Right-click the project node.
The project shortcut menu appears. Alternative: Select Project > Set Classpath from the Stylus Studio menu.
3. Select Set Project Classpath.
The Project Classpath dialog box appears.
4. Click the browse folders ( A new entry field appears in the Locations list box. Two buttons appear to the right of the entry field.
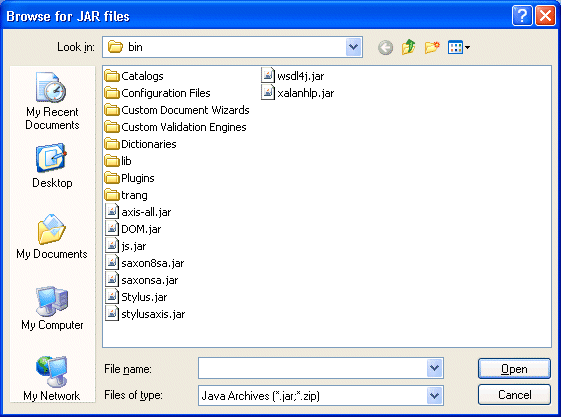
5. To add a JAR file to the classpath, click the browse jar files button ( Stylus Studio displays the Browse for Jar Files dialog box.
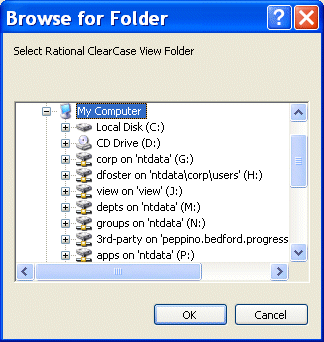
To add a folder to the classpath, click the browse folders button ( Stylus Studio displays the Browse for Folder dialog box.
6. When you have located the JAR file or folder you want to add to the classpath, click OK.
|
XML PRODUCTIVITY THROUGH INNOVATION ™