|
Home >Online Product Documentation >Table of Contents >Adding File Types to Stylus Studio Adding File Types to Stylus Studio
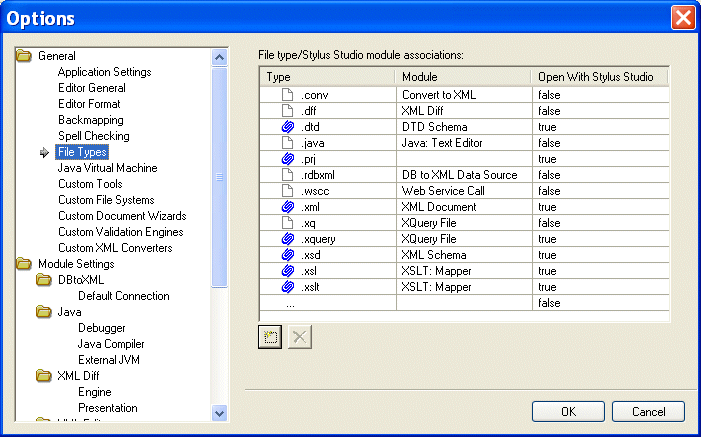
You use the procedure described in this section to associate a file type ( You can optionally specify that you want to use Stylus Studio as the default editor for files of this type, regardless of where the file is opened (from a file browser like Total Commander, for example).
To add a file type to Stylus Studio:
1. From the Stylus Studio menu bar, select Tools > Options.
Stylus Studio displays the Options dialog box.
2. Under General, click File Types.
The File Types page appears.
3. To add a new file type/module association, click the Add Alternative: Double-click the Type field.
4. Type the new extension, including the period, and press Enter.
Stylus Studio adds the file type and selects a default module in the Module field.
5. Optionally, select a different module using the drop-down list in the Module field.
6. If you want to always use Stylus Studio to open files of this type, change the value in the Open with Stylus Studio field to True.
8. When you are done, click OK.
Deleting File TypesTo delete a file type:
1. Click the file type you want to delete.
2. Click the Delete
3. Click OK.
|
XML PRODUCTIVITY THROUGH INNOVATION ™

 Cart
Cart


