Home >
Online Product Documentation >
Table of Contents >
Features of the Grid Tab
Features of the Grid Tab
This section describes the features of the
Grid tab. It covers the following topics:
Expanding and Collapsing Nodes
When you first display a document in the
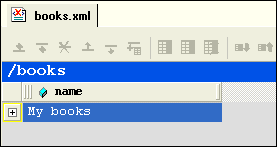
Grid tab, the document is collapsed so that it shows just the root element (here it is
<books>) and its name attribute (
My books), as shown in
Figure 127.
|
|
Figure 127. Default Display - Document Elements Are Collapsed
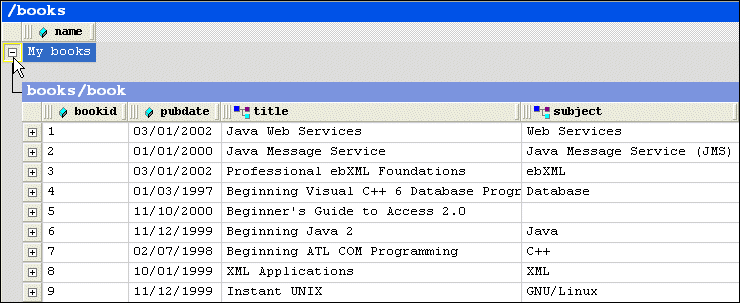
A plus sign displayed to the left of the node name indicates that this node has child nodes. You can click the plus sign to display a subgrid that displays the child nodes, as shown in
Figure 128.
|
|
Figure 128. Click Plus Signs to Expand Collapsed Tables
You can continue to drill down in this fashion to view all values.
To expand a node, click the plus sign (
 ).
).
Collapsing Empty Nodes
Some nodes in a document are simply containers - they have no content of their own. An example of a container node is the
<authors> element in
books.xml. The
<authors> element is simply a container for one or more
<author> elements, as shown in this excerpt of
books.xml:
To streamline the display, Stylus Studio hides the tables that represent container nodes. Information about container nodes is displayed in the child node's header.
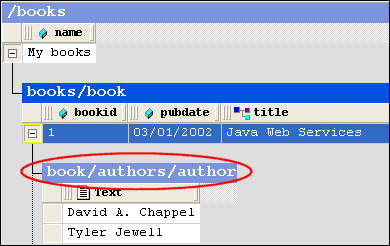
Figure 129 shows the default display for the
author element. Notice that the header,
book/authors/author, contains information about the container node,
authors.
|
|
Figure 129. Table Headers Show Full Path
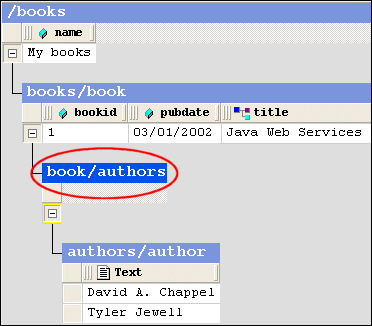
If you want, however, you can display the tables associated with container nodes, as shown in
Figure 130.
|
|
Figure 130. Container Nodes Are Hidden by Default
The table associated with the
authors node now appears in the grid; it is empty (it has no rows) because it is a container. The elements it contains are displayed in their own table,
authors/author.
To display container nodes, click Simplified View (
 ).
).
This action is also available from the
XML > Grid Editing menu and from the grid shortcut menu.
Renaming Nodes
You can rename container nodes directly in the grid.
To rename a node:
1. Double-click the header that represents the node you want to rename.
The node name is selected.
2. Type the name you want to use for the node.
3. Press Enter (or click elsewhere in the grid or grid background).
Resizing Columns
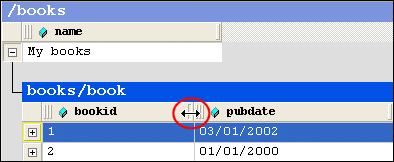
When you expand a node, Stylus Studio displays it in uniform columns. You can resize columns to any width you prefer by dragging the handle on the right side of the column header, as shown in
Figure 131.
|
|
Figure 131. Resize Columns by Dragging the Right Handle
To resize a column, drag the handle on the right side of the column header.
Showing Row Tag Names
In the grid view of a structured XML document, each child element of a node corresponds to a row in a table. For example, the
<books> node of
books.xml contains nine child elements; each row is an instance of the
<book> element. To preserve space in the grid, the tag names of child elements are not displayed as a separate column in the table. Rather, as shown in
Figure 128, this information is displayed in the table header itself.
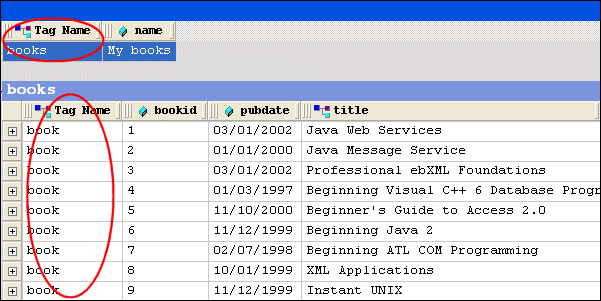
If you want, you can display the tag name for child elements in their own columns, as shown in
Figure 132.
|
|
Figure 132. Displaying the Root's Child Element
To toggle the display child element names, click Toggle Row Tag Name (
 ).
).
This action is also available from the
XML > Grid Editing menu.

 Cart
Cart