Cart
Cart|
Home > Online Product Documentation > Table of Contents > How to Add a Source Document How to Add a Source DocumentTo add a source document to XSLT mapper:
1. Click the
Mapper tab if necessary.
2. Click the
Add Source Document button at the top left of the
Mapper tab.
The Open dialog box appears.
3. Select the document you want to use as the source document to map to the target document.
4. Click
Open.
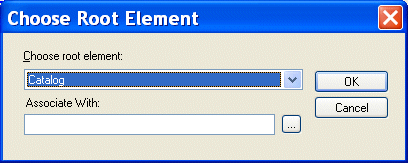
If you selected an XML document in step 3, the document appears in the source document pane of the Mapper tab. Go to step 5. If you selected an XSD or DTD document, Stylus Studio displays the Choose Root Element dialog box. You use the Associate With field to associate the XSD or DTD with an XML instance.
a. Select the element from the XSD or DTD document that you want to use as the root element. The
Choose root element drop-down list displays elements defined in the document you selected in
step 3.
b. Use the
Browse (
c. Click
OK.
The document appears in the source document pane of the Mapper tab. Go to step 5.
5. To add another source document, return to
step 2.
|
XML PRODUCTIVITY THROUGH INNOVATION ™