|
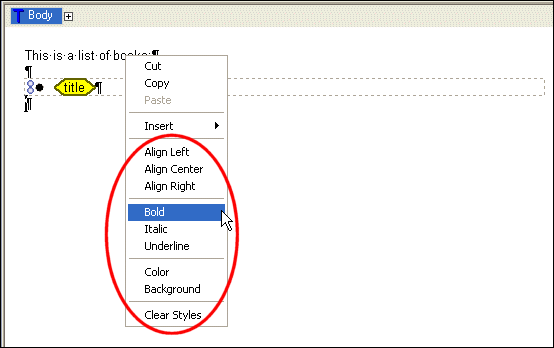
Home > Online Product Documentation > Table of Contents > Formatting Components Formatting ComponentsFormatting in XML Publisher works in a fashion similar to formatting in many text and graphical editors - you select the item you want to format and then apply a format from a tool bar, menu, or palette. An item can be As described later in this section, the effect of applying a format varies based on where and how you apply it. FormatsFormats include font, background and foreground (that is, text) color, size, and alignment. For a complete list of available formats, see Text Properties. Ways to Apply FormatsThere are several ways to apply formats to XML Publisher reports. You can use
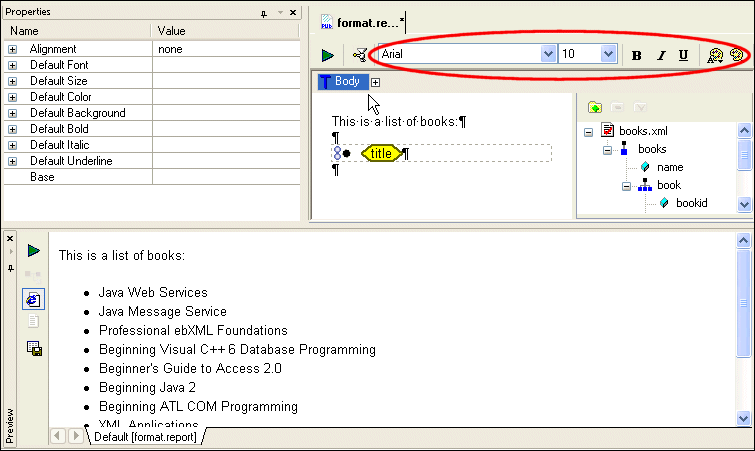
Each of these methods behaves in a similar fashion in that they apply a format to the currently selected item. The Properties window, however, is slightly different - in addition to applying a format, it sets the default for the component that currently has focus. See Setting Default Properties for more information. Formatting Influenced by Component HierarchySince all components in a report occur within the context of the body component, any formatting you perform to the body component affects every component it contains - every table, list, text component, and so on - unless that component has a default value for the same format property specified on the Properties window. Put another way, any formatting applied to a parent component affects all of its children unless that child has a default value specified for it. Consider the following example report, which shows an introductory sentence (body text) and a list of book titles (list component).
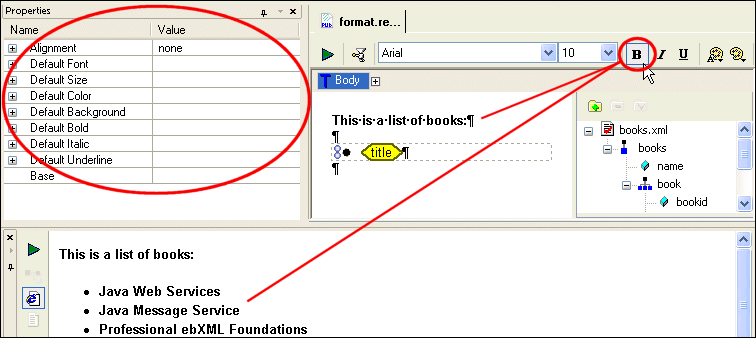
All of the report's components are displayed using the XML Publisher default settings for the body component, as seen in the toolbar (font is Arial, size is 10, non-bold, non-italic, no underline, and so on). If we now click the Bold button on the toolbar, all of the report's text, including the list component items, is rendered in bold - the list component is a child of the body component, so all formatting done to the body cascades to the list as well.
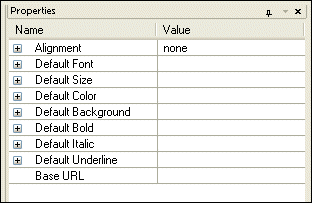
Notice that the values in the Properties window have not changed - although we have changed some of the formatting characteristics for the body component, we have not set any of its default values.
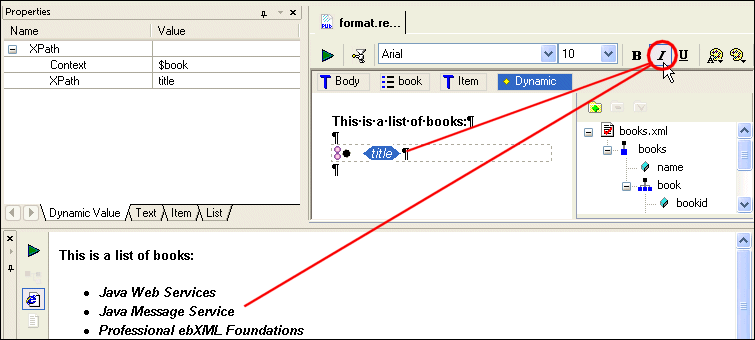
Next, we select just the
Notice that the label in the value glyph has been italicized. And when we preview the report, we see that the text representing each data value (each book's
The value glyph has a format state separate from the body, and this state is reflected in both the glyph (the label is italicized) and the tool bar (when the glyph is selected, the italic tool in the tool bar s highlighted). Setting Default Properties
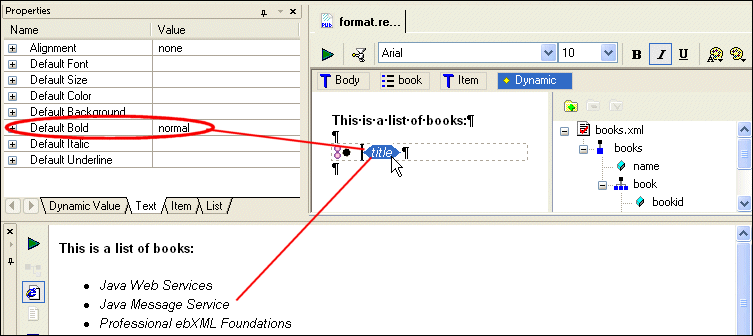
Default properties allow you to specify formatting for a child component that differs from that of its parent components. These settings remain in effect regardless of how the formatting for its parents changes. Return to the example illustrated in
Figure 479 - all of the report's text is bold (we formatted the body component using the bold tool), and the list text is also italic (we formatted the
If we do not want the list text to appear in bold, we need to establish a default for it - otherwise, it will continue to inherit the bold setting from its parent, the body component. So, as shown in Figure 480, we click the glyph to give it focus, and then change the Default Bold setting to Normal.
Clearing Formats
You can clear formats you have applied using the
Clear Styles button (
To clear formatting:
1. Select the report component whose formatting you want to remove.
2. Click the
Clear Styles button (
Alternatives: Select Report > Text > Clear Styles from the menu, or select Clear Styles from the short-cut menu (right-click). The formatting is removed from the component you selected. Default settings are not affected. |
XML PRODUCTIVITY THROUGH INNOVATION ™

 Cart
Cart
