|
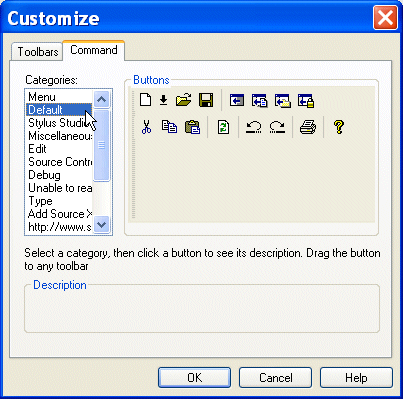
Home > Online Product Documentation > Table of Contents > Adding and Removing Buttons Adding and Removing ButtonsTo add a button to a tool bar:
1. Display the
Customize dialog box (
Tools > Customize).
2. Click the
Command tab.
3. In the
Categories field, click the group of buttons you want to rearrange (such as the
Default group shown in
Figure 94).
Stylus Studio displays the buttons in that group in the Buttons group box.
4. Drag the button from the
Buttons group box to the target location on the Stylus Studio toolbar.
5. Click a new category to rearrange buttons in that category, and click
OK.
To remove a button from a toolbar, drag it off the toolbar. |
Metals, Mining & Crude-Oil Production
It can be very dark and dreary in a mine. That's why metal, mining & crude-oil production are using Stylus Studio as their light when it comes to data integration. See which of these top companies are using Stylus Studio to show them the way to XML!
Property Management & Real Estate
Building DataDirect XQuery Applications
Stylus Studio further simplifies relational and XML data integration by providing advanced XQuery tools support for building XQuery applications which use DataDirect XQuery.
XML Helps Uncork Innovative Winery Web Sites
Learn how Freerun Technologies, Inc., a leading Internet services provider used Stylus Studio and XML technologies to develop a framework for Web-based eCommerce applications for the wine industry, reducing development cycles.


