Cart
Cart
|
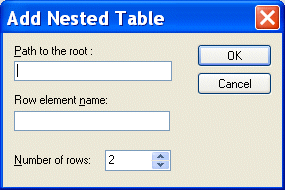
Home >Online Product Documentation >Table of Contents >Working with Tables Working with TablesStylus Studio provides several features to help you work with tables in the Grid tab. Changes you make to tables in the Grid tab, such as adding a nested table, are reflected in the underlying XML document. This section covers the following topics: Adding a Nested TableYou add nested tables to a document in the Grid tab using the Add Nested Table dialog box, shown in Figure 123. This dialog box allows you to specify the path to the root for the new table, a row element name, and the number of rows.
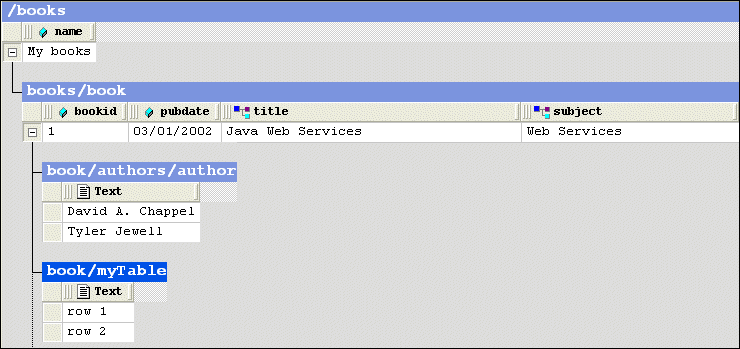
A nested table is created as a child of the current element. The nested table shown in Figure 124,
Nested tables are created with two default rows, which use the element name you provide in the Row Element Name field of the Add Nested Table dialog box. Rows get a default text value of To add a nested table:
1. Select the element to which you want to add a nested table.
2. Click Add Nested Table ( The Add Nested Table dialog box appears.
3. Optionally, specify the path to the root. If you leave this field blank, the nested table is created as a child of the current element.
4. Enter a row element name.
5. Optionally, change the number of default rows.
6. Click OK.
The nested table is added to the document and appears in the grid. Moving a Nested TableYou can change the order of nested tables within a row. To move a nested table:
1. Select the heading of the nested table you want to move.
2. Click the Move Up ( Deleting a TableTo delete a table:
1. Select the heading of the table you want to delete.
2. Click Delete ( The table is deleted from the document. Sorting a TableYou can sort tables on any column in ascending or descending order. To sort a table:
1. Select a cell in the column on which you want to sort the table.
2. Click the Sort Ascending ( The table rows are sorted based on the order you select. Copying a Table as Tab-Delimited Text
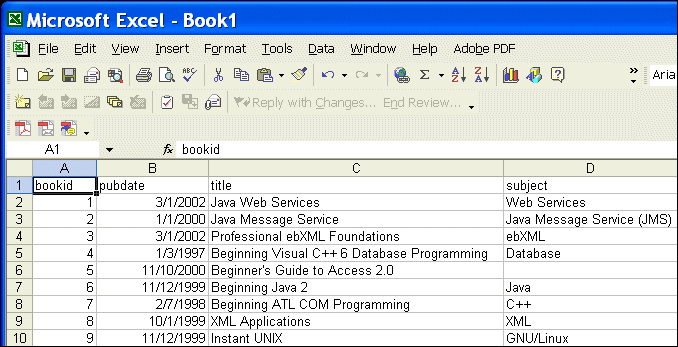
You can copy a tab-delimited text version of a table to the clipboard. This makes it possible to paste document contents from the grid into spreadsheets and other editors that can manage tab-delimited files. Figure 125 shows Note that when you use this feature, the entire table is copied - column headings (element and attribute names) are not distinguished from cell contents (element and attribute values) in the spreadsheet. To copy a tab-delimited table to the clipboard:
1. Select the heading of the table you want to copy.
2. Select XML > Grid Editing > Copy as Tab-Delimited from the menu. This action is also available from the grid shortcut menu.
|
XML PRODUCTIVITY THROUGH INNOVATION ™